Building Cross-Platform Mobile Applications with Xamarin.Forms
13 December 202127 April 2017 | Software
How fast can you build a mobile application? How long does it take to test it? How maintainable is your code? Xamarin.Forms can help you improve all the above. Have a quick glance at the platform here. Also, take a loot at Fortech’s Xamarin outsourcing services for cross-platform mobile apps development.
Xamarin.Forms is probably not the last framework you will need to learn, but if you are building a business application with focus on content rather than visual effects, then Xamarin.Forms is most likely the right choice for you.
The Tools
For building cross-platform mobile applications, you can start the development with Xamarin Studio or Visual Studio for Mac. I will use Xamarin Studio as an example in this article, as Visual Studio for Mac is still in preview mode.
The Project
For a better understanding, I will continue this article with a step-by-step tutorial on how to build a proof of concept application. This way, I will illustrate the main concepts needed to build a cross-platform mobile application and give you a jumpstart into your project. The demo code can be found here.
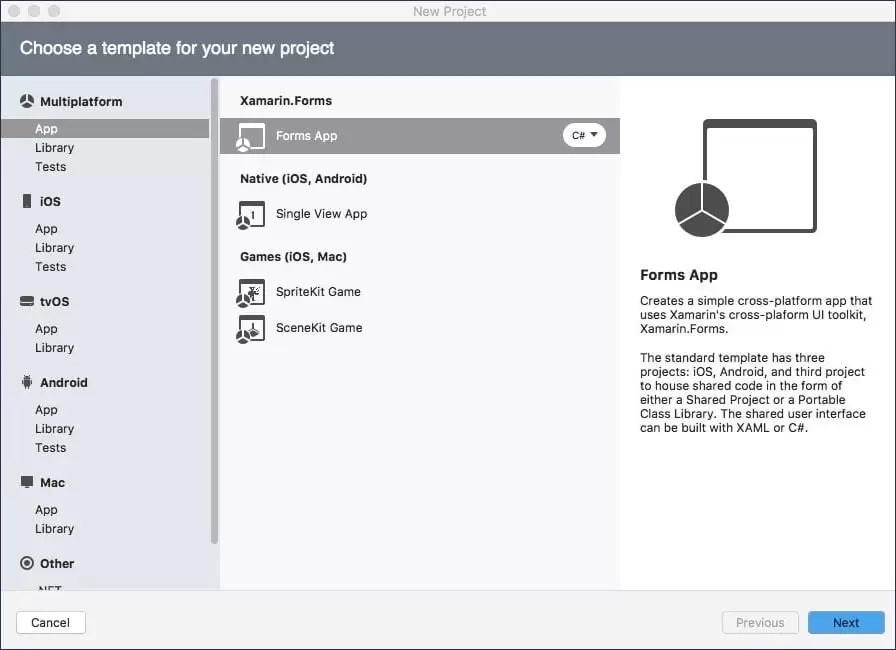
To begin, start a new solution as in the image bellow:
In the next screen, choose a name for your application:
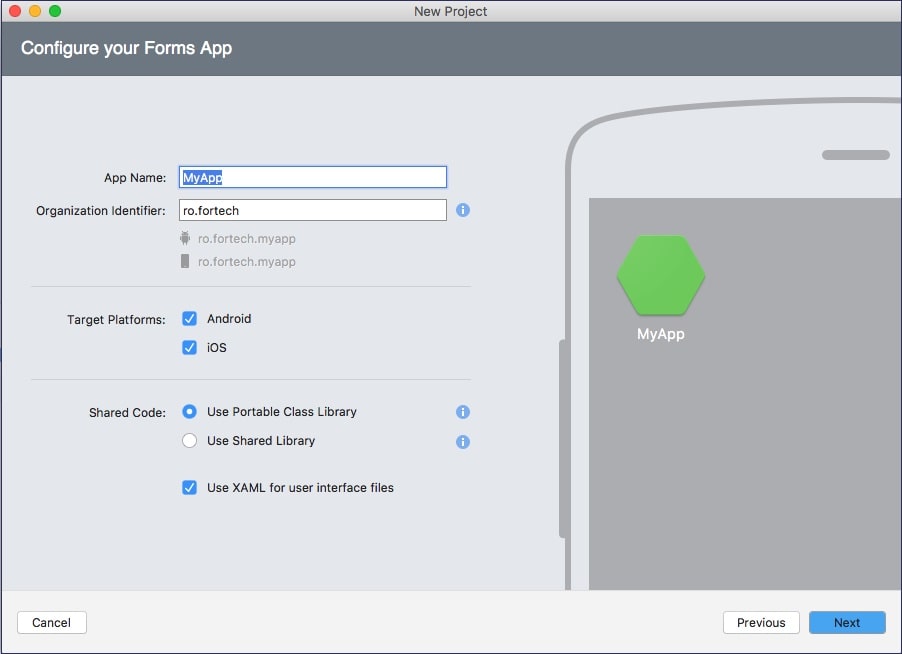
As you can see in the image above, there are two ways of sharing code between platforms. Without digging too much into it right now, I will be choosing PCL, as this will give us the desired flexibility. You can read more about the differences between the two options here.
What we get is a solution with 3 projects:
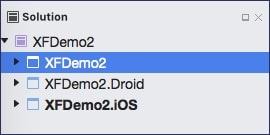
The .Droid and .iOS projects provide the needed infrastructure for each platform. This way, all of the application logic and the UI description will remain in the first project.
To separate the application business logic for the UI (XAML), Xamarin.Forms uses the MVVM software architectural pattern. Learn more about it here.
For an easy navigation, there are many ways of organizing your UI/code by bringing 3rd party libraries, but using this approach will require a larger effort when you will be writing your own infrastructure for page navigation.
The Navigation
The IViewModelNavigator will define all operations for navigating from one viewmodel to the next and back. The implementation of the ViewModelToPageNavigator links our viewmodel to viewmodel navigation with the Xamarin.Forms native page navigation.
The PageViewModelAttribute helps us identify which page corresponds to which viewmodel.
This mapping is done at application start in NavigationHelper.MapViewModelTypeToPageType().
public App()
{
  InitializeComponent();
  SetLocalLanguage();

  MainPage = CreateMainPage();
}

private static Page CreateMainPage()
{
  var navigationMap = NavigationHelper.MapViewModelTypeToPageType();
  var mainViewModel = new ViewModels.MainViewModel();

  var viewModelToPageNavigator = new ViewModelToPageNavigator(mainViewModel, navigationMap);
  return viewModelToPageNavigator.Root;
}
The ViewModel
Each viewmodel will have ViewModel as base class and will get a reference to the IViewModelNavigator.
public abstract class ViewModel : INotifyPropertyChanged
{
  public IViewModelNavigator ViewModelNavigator { get; set; }

  public event PropertyChangedEventHandler PropertyChanged;

  protected void OnPropertyChanged([CallerMemberName] string propertyName = "")
  {
    if (PropertyChanged != null)
	{
	  PropertyChanged(this, new PropertyChangedEventArgs(propertyName));
	}
  }
}
In this step, navigating in your application is explicit. We are now just one function call away from obtaining the desired result.
ViewModelNavigator.PushAsync(//an instance of your viewmodel to navigate to);
The View
Each UI page will have its viewmodel “attached” by decorating the page constructor like this:
Navigation.PageViewModel(typeof(ViewModels.MainViewModel))]
public partial class MainPage : ContentPage
At this point, we are only left with building the UI by using the xaml file and connecting it to the viewmodel.
<ContentView>
...
<Button Command="{Binding ShowSectionPageCommand}" Text="{l10n:Localization Option1ButtonText}" HorizontalOptions="StartAndExpand" VerticalOptions="Center" CommandParameter="Option1" Image="Option1.png" Style="{StaticResource MainMenuButtonStyle}" />
...
</ContentView>
This way, the ShowSectionPageCommand is linked to the button and will fire when the command is touched.
By leveraging the xaml file you can move your styling way into the dedicated file, the App.xaml under Application.Resources and keep colors and fonts there.
The Model
The application doesn’t explicitly define a model for each viewmodel, but you can use POCO in your application.
The Localization
Most likely, your application needs localization/internationalization. This is achieved with the help of the resx files and an infrastructure built around them.
For localization, we use the LocalizationExtension and ILocalize instead of the Text property. ILocalize is platform specific.
[ContentProperty("ResourceName")]
public class LocalizationExtension : IMarkupExtension
{
  const string ResourceId = "XFDemo2.AppResources";
  private readonly CultureInfo currentCultureInfo;

  public LocalizationExtension()
  {
    currentCultureInfo = DependencyService.Get().GetCurrentCultureInfo();
  }

  public string ResourceName { get; set; }

  public object ProvideValue(IServiceProvider serviceProvider)
  {
    if (ResourceName == null)
    {
      return string.Empty;
    }

    var resmgr = new ResourceManager(ResourceId
				, typeof(LocalizationExtension).GetTypeInfo().Assembly);

    var translationForResourceName = resmgr.GetString(ResourceName, currentCultureInfo);

    // pass name of resource back if not found
    if (translationForResourceName == null)
    {
      translationForResourceName = ResourceName;
    }

    return translationForResourceName;
  }
}
Find more about the IMarkupExension here and about the DependencyService here.
Conclusion
This is just one of the many ways of organizing your project to create a fast/testable/maintainable code base for your application while leveraging your in-house C# expertise. Treat the code as a starting point and bend it to your project needs.
About the Author

Aurelian


